* an article from KenRockwell.com
What Are We Trying to Achieve?
I'm creating art. I'm not trying to duplicate reality. Photography has never been able to duplicate reality, and if it could, it's not art. See What is Art? This isn't about trying to get the photo to match what we see while we stand there, although these same techniques apply. Default camera settings rarely duplicate what we see.
The results I want are what I'm seeing in my mind's eye. I'm taking something from my imagination and fixing it in tangible form. Under optimum conditions I want what I see, but in crappy conditions, I want to make my photo better than reality.
I start with what I've got at the scene. The difference between what I've got and what I see in my imagination are the adjustments and filters I apply.
What I've got + Adjustments = What I Want.
Why Not Do it Later in Photoshop?
*This is why I love shooting my pics in JPEG*
* Master your in camera Setting to produce stunning Color & Exposure*
* Master your in camera Setting to produce stunning Color & Exposure*
1.) It's too much work. I make many shots at the same settings, resulting in photos ready to publish straight from my camera.
2.) You can lighten and change color later in Photoshop, but overexposure loses information in blank highlights and washed-out colors. These are difficult or impossible to repair. Unfortunately many current Nikon and Canon cameras overexpose in contrasty light, which is irreparable if you don't set the correct exposure compensation in-camera.
3.) Mathematically it's more elegant to create the image properly in-camera, even if it's not visibly different from tweaking it later. Every camera starts with raw data from which it creates JPGs. Photoshopping later causes no visible degradation, but some people still worry about resaving JPGs from the scare stories that circulated back in the 1990s. Color issues are best set in-camera.
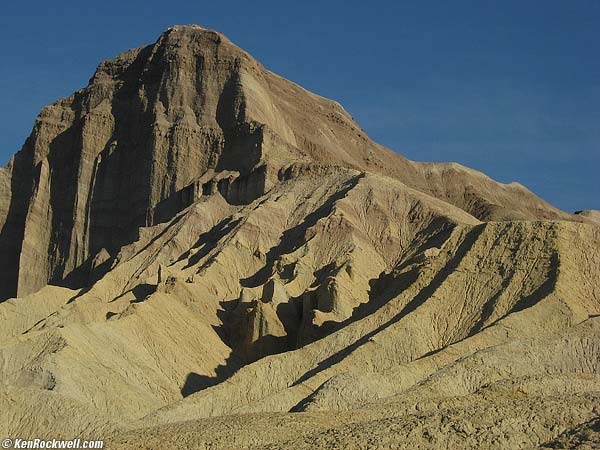
ExamplesHere's what I get straight out of a camera. In this case, it's a $199 Canon A550.

Manly Beacon, Death Valley, California. Default settings.
Most people would be perfectly happy with this. I think it's dull and washed out. It's too light and loses color in the highlights.
OK, this bad shot isn't that bad. The light here is pretty soft, and would work OK at the default exposure, but would clip the reds in the highlights once I get done pumping up the color further down this page. One day I'll get better examples of bad shots.
Many Nikon and Canon cameras tend to overexpose right out of the box, which gives better results for backlit faces in bad, contrasty lighting often used by the inexperienced, but looks awful if you are paying attention.
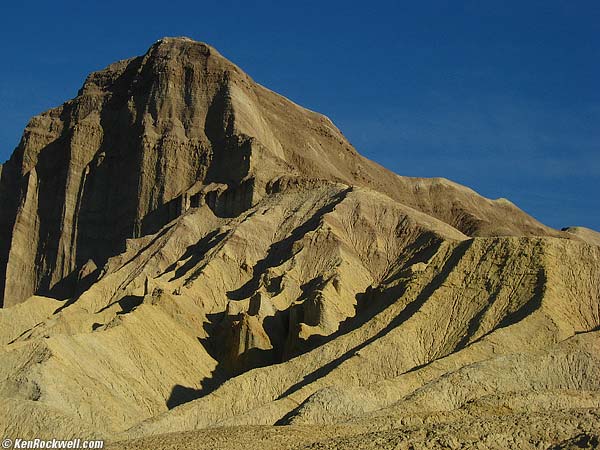
Let's make it a little darker. I set -2/3 stop exposure compensation as my personal default on all my Canon cameras, and on my Nikon D40 and D80. I leave it at zero on my other Nikons.
I set this on Canon Compacts by pressing FUNC/SET, clicking up or down if I need to to get to the 0, and click two left to -2/3. On DSLRs press the +/- button and spin a dial, or you may need to find a menu on other than Canon and Nikon. Search my site to see if I mentioned it for your camera, or call Canon at (800) OK-CANON or Nikon at (800) NIKON-UX if you can't find it.

Manly Beacon, Death Valley, California. -2/3 stop exposure compensation.
This looks better to me, although maybe too dark. No big deal; this article is to show you what big differences in real picture quality come from moving the settings. We'll pump things up soon.
It's still dull. Let's pump up the contrast and color saturation.
On Canon compacts you do this by hitting FUNC/SET, click down to the little icon of a tube of paint marked OFF (between AWB and [ * ]) and click one to the right to get V, Vivid. I've used this setting on every compact Canon I've used for about the past four years. Every Canon compact has this.
In Nikon DSLRs it's hidden under OPTIMIZE IMAGE. I set + Saturation and Color Mode III. Search my site to see if I mentioned it for your camera, or call Nikon at (800) NIKON-UX if you need help finding it.
In Canon DSLRs it's called Picture Styles or Parameters. Search my site to see if I mentioned it for your camera, or call Canon at (800) OK-CANON.

Manly Beacon, Death Valley, California. -2/3 stop, Canon's Vivid color mode.
Better, but too gray for me. I like my rocks nice and orange.
As you know from my White Balance page, you can make the rocks any color you want by setting the WB control. Choose Cloudy for warm, or Shade for warmer. Many basic cameras lack a Shade setting.
If you want to go crazy, set a manual custom white/gray-card white balance, but point your camera at blue sky! This makes any camera force the blues to become neutral by adding a lot of orange. I control the degree of orange by how far up I point my camera. The more blue the sky when setting a custom WB, the more orange the resulting photo. If I point my camera at a less blue area of the sky, I get a less crazy result. Canon point-and-shoots are the best for this, since they have a very easy-to-set custom WB setting which looks at a spot in the middle of your LCD. Canon DSLRs are the very worst.

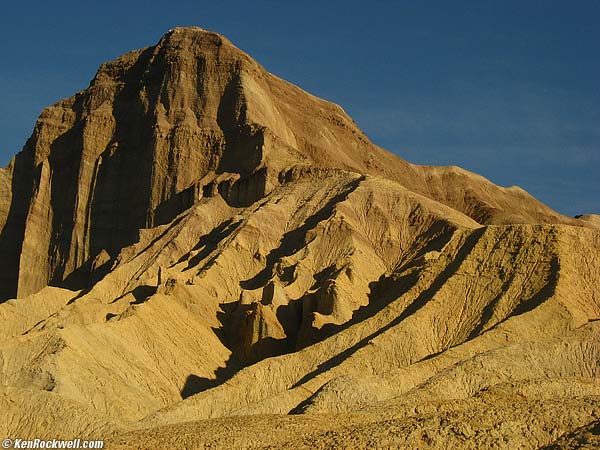
Manly Beacon, Death Valley, California. -2/3, Vivid color mode, Cloudy WB.
AHA!! Not perfect, but as perfect as I'm going to get out of the camera for this particular example.
Note how the reds and yellows have lit up. If I used more exposure they would have started to look like week-old pizza instead of textured rock. (You hackers could open this last shot in Photoshop and see that the red histogram is almost maxed out.)
Another Example

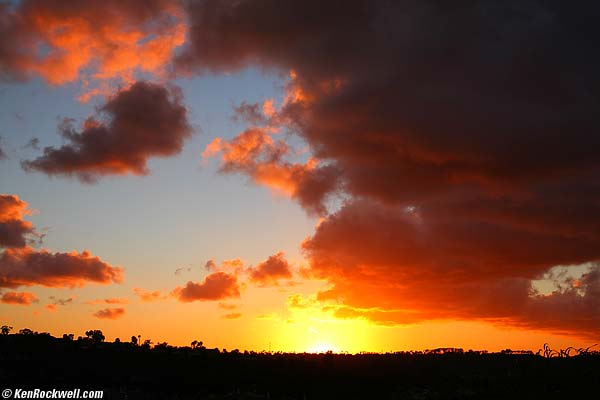
Sunset. Canon 5D, right out-of-the-box.

Sunset. Canon 5D, set to -2/3 compensation and +4 saturation.
You set saturation in Canon DSLRs under Menu > Picture Style (or Parameters) > choose one to modify > Jump > Change it > press SET. If you forget to press SET you may not make the change.
*my words - we can always tweak pics in Photoshop when the photo needs adjustment. Frankly speaking, unless you are really squeeze all those juice out of RAW for some crazy pixel peepers to evaluate or else it would be impractical using RAW format(you will spend most of your precious TIME doing editing). Most people can't tell the difference of a processed photo whether it was from JPEG or RAW, unless viewing with EXIF file.
thanks to KenRockwell.com

2 comments:
I have never use photoshop. I just use Microsoft picture viewer and click on "fix me". Done! Voila.:D
ya~ ^^
as long as feeling ease of use and pleased with the result.
sometime i did use Picasa 3 too, easy and fast.
Post a Comment